biology laboratory manual 13th edition pdf

This manual serves as a comprehensive resource for biology students, offering hands-on experiences to explore scientific concepts․ Designed to enhance learning through practical experiments and exercises, it provides detailed guidance for laboratory work, ensuring a deeper understanding of biological principles and their applications․

Overview of the Biology Laboratory Manual 13th Edition

The 13th edition of the Biology Laboratory Manual is a refined and updated resource designed to enhance student engagement and understanding․ It incorporates cutting-edge techniques, modern lab exercises, and improved visual aids to align with current educational standards․ The manual emphasizes hands-on learning, critical thinking, and scientific inquiry, making it an indispensable tool for both students and educators in biology education․

Key Features of the 13th Edition

The 13th edition introduces enhanced digital integration, including a downloadable PDF version for easy access․ It features updated exercises, improved safety protocols, and expanded visual aids like diagrams and videos․ New chapters on molecular biology techniques, such as PCR and gel electrophoresis, are included․ The manual also offers additional online resources, including interactive simulations and lab report templates, to support comprehensive learning․

Structure and Organization of the Manual

The manual is organized into clear chapters, each focusing on specific biological topics․ It progresses logically, from basic microscopy to advanced molecular techniques, ensuring a structured learning experience․

Chapter Breakdown and Content Coverage

The 13th edition of the biology laboratory manual is divided into comprehensive chapters, each addressing specific biological concepts and practical exercises․ Early chapters focus on foundational skills such as microscopy and cell observation, while later sections delve into advanced techniques like DNA extraction and PCR․ Each chapter includes detailed protocols, safety guidelines, and expected outcomes, ensuring thorough coverage of essential laboratory practices․

Integration of Visual Aids and Illustrations

The 13th edition of the biology laboratory manual incorporates a wide range of visual aids, including detailed diagrams, photographs, and illustrations․ These elements are designed to clarify complex biological concepts and procedures, making them easier to understand․ High-quality images of microscopic structures, molecular processes, and experimental setups are prominently featured․ Flowcharts and tables are also used to summarize key information, enhancing student comprehension and retention of laboratory techniques and theoretical knowledge․

Experiments and Practical Exercises

The manual includes a variety of experiments covering cell biology, genetics, and ecology․ These hands-on exercises encourage active learning and the development of practical skills․

Types of Experiments Included

The manual includes diverse experiments such as cell structure observations, genetics studies, and molecular biology techniques like DNA extraction and PCR․ It also covers ecology experiments, including population studies and environmental analysis․ These exercises are designed to reinforce theoretical concepts and develop practical laboratory skills, ensuring students gain hands-on experience with modern biological methods and tools․

Design and Execution of Laboratory Experiments

Each experiment is carefully designed to promote critical thinking and skill development․ Clear objectives, step-by-step procedures, and safety protocols guide students․ Experiments include preparation of materials, observation techniques, and data collection․ Emphasis is placed on minimizing variability and troubleshooting common issues; Expected outcomes are provided to help students assess their results․ Proper documentation and data analysis are encouraged to reinforce learning and scientific inquiry․

Lab Safety and Best Practices

Adhering to safety protocols is crucial in biology labs․ Students must wear PPE, follow proper chemical handling, and maintain a clean workspace; Regular clean-up ensures safety․

Essential Safety Protocols

Essential safety protocols in the biology lab include wearing personal protective equipment (PPE), handling chemicals with care, and following emergency procedures․ Students must avoid eating or drinking in the lab and ensure proper ventilation․ All equipment should be used as instructed, and hazardous waste must be disposed of correctly․ Adhering to these protocols minimizes risks and ensures a safe learning environment for everyone involved in laboratory activities․

Lab Etiquette and Clean-Up Procedures

Proper lab etiquette involves cleaning work areas before and after use, using disinfectants, and disposing of waste correctly․ Students should respect shared equipment, avoid unauthorized experiments, and follow instructors’ guidelines․ Clean-up procedures include sanitizing surfaces, storing materials properly, and ensuring a tidy environment․ These practices promote a safe, efficient, and respectful laboratory setting for all participants, fostering collaboration and accountability among students throughout their lab experiences․

Microscopy and Cell Studies

Microscopy is a cornerstone in biology, enabling detailed exploration of cell structures․ This section guides students through microscope operation and cell observation techniques, enhancing understanding of cellular biology․

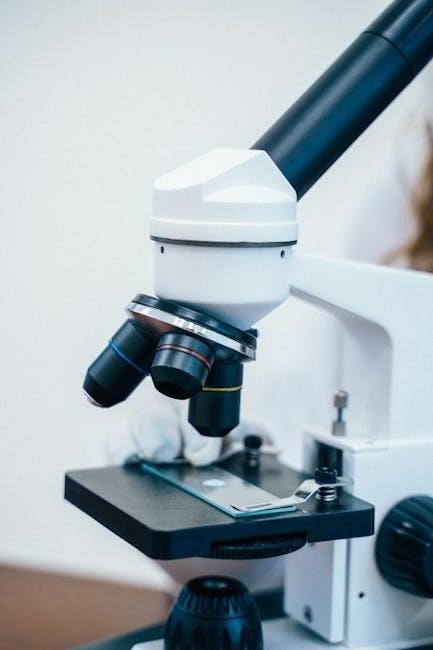
Understanding Microscope Operation

Mastering microscope operation is essential for cell studies․ This section explains the microscope’s structure, focusing techniques, and proper handling․ Students learn to adjust condensers, use objective lenses, and maintain clear visibility․ Detailed steps ensure precise observations, enhancing the accuracy of cellular examinations․ Proper care and maintenance of the microscope are also emphasized to prolong its functionality and performance in laboratory settings․ This knowledge is vital for successful biological investigations․

Cell Structure and Observation Techniques

This section explores cell structure, emphasizing the role of microscopes in observing cellular details․ Techniques include preparing slides, staining samples, and using immersion oil for clarity; Students learn to identify organelles like mitochondria and chloroplasts․ Proper observation methods ensure accurate data collection․ The manual provides exercises to enhance understanding of cellular functions and structures, offering a foundation for advanced biological studies․ These techniques are crucial for laboratory success․

Molecular Biology Techniques

This section covers essential methods in molecular biology, including DNA extraction, PCR, and gel electrophoresis․ These techniques enable students to analyze and manipulate genetic material effectively․

DNA Extraction and Analysis

DNA extraction and analysis are fundamental techniques in molecular biology․ These processes involve isolating DNA from cells, ensuring purity, and preparing it for further study․ Methods include cell lysis, centrifugation, and precipitation․ Analysis techniques, such as gel electrophoresis, allow visualization and identification of DNA fragments․ These procedures are crucial for understanding genetic material and conducting advanced molecular studies, providing students with practical skills in genetic analysis and manipulation․

PCR and Gel Electrophoresis Procedures

PCR (Polymerase Chain Reaction) is a technique used to amplify specific DNA sequences․ It involves repeated cycles of DNA denaturation, primer annealing, and extension․ Gel electrophoresis is a method for separating DNA fragments by size, using an electric field․ Agarose gels are commonly used, with ethidium bromide for visualization․ These procedures are essential for molecular biology, enabling the analysis and identification of DNA fragments in genetic studies and experiments․

Data Analysis and Reporting

Data analysis involves interpreting laboratory results, ensuring accuracy and relevance․ Proper reporting includes clear, concise documentation of methods, results, and conclusions, using graphs and charts for effective communication․

Recording Observations and Results

Accurate and detailed recording of observations and results is crucial in biological experiments․ Use a clean, organized notebook to document data, ensuring clarity and reproducibility․ Include descriptions of procedures, measurements, and visual observations․ Data should be presented in tables or graphs when appropriate․ Maintain consistency in units and formatting․ Digital tools can also be used to store and analyze data efficiently, ensuring precision and ease of reference for future review or reporting purposes․

Formatting and Presenting Lab Reports

Lab reports should be formatted clearly, with a title, introduction, methods, results, and conclusion․ Use headings and subheadings to organize content․ Include tables, graphs, or images to illustrate findings․ Ensure proper citation of sources and adhere to scientific writing standards․ Use clear, concise language and avoid jargon․ Final reports should be proofread for accuracy and submitted in the required format, such as PDF, to maintain professional presentation and readability․

Troubleshooting Common Lab Issues

Identify and resolve experimental problems promptly to ensure accurate results․ Refer to the manual for tips on optimizing outcomes and addressing common challenges effectively․

Identifying and Solving Experimental Problems

Common lab issues, such as contamination or incorrect measurements, can be addressed by following the manual’s troubleshooting guide․ Identify root causes, adjust procedures, and document solutions to optimize results․ The manual provides clear steps to resolve problems, ensuring experiments yield accurate and reliable data․ By mastering these strategies, students can enhance their critical thinking and experimental design skills, leading to successful and meaningful lab experiences․

Optimizing Experimental Outcomes

Optimizing experimental outcomes involves careful planning, precise measurements, and adherence to protocols․ Regular calibration of instruments and thorough preparation of materials ensure accuracy․ Maintaining proper environmental conditions and minimizing contamination risks are critical․ By following the manual’s guidelines, students can refine techniques, analyze data effectively, and draw meaningful conclusions․ Iterative adjustments based on observations further enhance results, fostering a deeper understanding of biological processes and experimental design․

Digital Resources and Supplements

The 13th edition provides access to digital resources, including a downloadable PDF version, interactive simulations, and multimedia content, enhancing learning through accessible and engaging supplementary materials online․

Accessing the PDF Version

The 13th edition of the biology laboratory manual is available as a downloadable PDF, offering convenient access to all chapters and exercises․ Students can easily navigate through the digital version, which is compatible with various devices․ The PDF format ensures that all visual aids, illustrations, and text remain clear and intact․ This digital accessibility allows for flexible learning, enabling users to study and reference materials anytime, anywhere․ Additionally, the PDF can be organized with bookmarks for quick navigation․

Additional Online Materials and Tools

Beyond the PDF, the 13th edition provides supplementary online resources, including interactive simulations, video tutorials, and practice quizzes․ These tools enhance learning by offering visual and hands-on experiences․ Instructors can also access a dedicated portal with teaching aids and customizable assessments․ The online platform fosters engagement and reinforces concepts through dynamic content, ensuring a well-rounded educational experience for both students and educators alike․

offensive line drills pdf

Proper Stance and Footwork Fundamentals

A proper stance is essential for offensive linemen, requiring a coiled and comfortable position. Footwork drills like the Birddog and Wave Drill enhance initial steps and explosion.

  • Stance: Cocked and coiled for power and balance.
  • Footwork: Drills focus on agility, explosiveness, and reaction time.
  • These fundamentals are critical for effective run and pass blocking techniques.

Consistent practice of these basics builds discipline and technique.

1.1 Birddog Drill for Initial Steps

The Birddog Drill is a dynamic warm-up exercise designed to improve offensive linemen’s initial steps and footwork in the run game. Players start in a proper stance, focusing on explosiveness and agility. The drill involves quick, precise movements, such as lateral shuffles and forward steps, mimicking game-like reactions. Coaches emphasize staying low, driving knees, and maintaining balance. This drill helps linemen develop muscle memory for their first steps, ensuring they can explode off the line effectively. It also enhances reaction time and body positioning, making it a foundational tool for building a strong run-blocking technique. Consistency in this drill translates to better performance on the field.

1.2 Wave Drill for Get-Off Technique

The Wave Drill is a specialized exercise aimed at refining offensive linemen’s get-off technique and reaction to the snap. Players line up in their stance and explode forward as soon as the ball is snapped. The drill focuses on quick hand placement, weight transfer, and driving through the block. Coaches emphasize the importance of staying low, using leg drive, and maintaining balance. This drill helps linemen develop a consistent and explosive start, crucial for dominating the line of scrimmage. By practicing the Wave Drill, players build the ability to react swiftly and deliver powerful blocks, enhancing their overall run-blocking efficiency and effectiveness in game situations.

Run Blocking Techniques and Drills

Run blocking requires proper stance, explosive get-off, and precise footwork. Drills like the Pro Agility Drill and Line Run Block Progression refine technique and build power.

2.1 Pro Agility Drill for Lateral Movement

The Pro Agility Drill enhances lateral movement and quickness. Offensive linemen start in a two- or three-point stance, sprinting laterally for 5 yards, touching the line, and returning. This drill improves reaction time, agility, and explosiveness. It mimics game situations, preparing linemen for dynamic blocking scenarios. Proper footwork and body control are emphasized to maintain balance and generate power. This drill is essential for developing the lateral speed needed in run blocking and pulling techniques. Consistent practice ensures linemen can efficiently move and block in tight spaces, a critical skill for successful run plays. Its effectiveness is widely recognized in offensive line training programs.

2.2 Line Run Block Progression

Line Run Block Progression is a phase-based drill that teaches offensive linemen to block effectively in the run game. It breaks down the offense into smaller parts, allowing linemen to master each phase before combining them. The progression starts with basic blocking techniques, such as exploding off the ball and maintaining hand placement, before advancing to more complex scenarios. Each phase focuses on a specific skill, like blocking a defensive lineman or reaching a linebacker. This approach ensures linemen understand their assignments and execute blocks with precision. The progression culminates in live reps against defensive looks, helping linemen apply techniques in game-like situations. This methodical training builds confidence and proficiency in run blocking.

Pass Blocking Essentials

Pass blocking requires precise technique, starting with a balanced stance. Linemen use the HOT technique (Hands On Torso) to control defenders, keeping feet active and delivering blows.

3.1 Sled Drive Block for Power

The sled drive block is a fundamental drill for developing raw power and explosiveness in offensive linemen. Athletes start in a stance, engage the sled with their hands, and drive forward, emphasizing leg drive and maintaining a low center of gravity. This exercise mimics blocking scenarios, enhancing strength and technique. Proper form is crucial to avoid injury and maximize effectiveness. Coaches often use this drill to build the physicality needed for dominating at the point of attack. Regular practice improves both power and endurance, making it a cornerstone of offensive line training programs.

3.2 HOT Technique (Hands On Torso)

The HOT (Hands On Torso) technique is a pass-blocking fundamental that emphasizes proper hand placement and body positioning. Linemen place their hands on the defender’s torso, maintaining control while keeping their feet active. This technique ensures balance and the ability to mirror the defender’s movements. Coaches stress the importance of staying engaged without overextending, allowing for quick reactions to various rush moves. The HOT technique is crucial for neutralizing pass rushers and protecting the quarterback. Regular drills, such as the sled drive block, help reinforce this method, ensuring linemen can effectively block while maintaining proper form and generating power.

Agility and Footwork Drills

Agility drills like the NFL Pro Shuttle Run and Bear Crawl enhance speed, lateral movement, and explosiveness. These exercises improve footwork and reaction time for offensive linemen.

4.1 NFL Pro Shuttle Run

The NFL Pro Shuttle Run is a dynamic drill that evaluates speed, agility, and lateral movement. Offensive linemen start in a three-point stance, sprinting 5 yards laterally, then back, and finishing with a 10-yard dash. This drill mimics game scenarios, improving reaction time and explosiveness. Proper footwork and balance are emphasized to maintain efficiency. Coaches often use this drill to assess an athlete’s ability to change direction quickly and explode out of cuts, making it a critical tool for enhancing offensive line performance in both run and pass blocking situations. Regular practice of this drill builds the necessary agility for linemen to excel on the field.

4.2 Bear Crawl for Explosiveness

The Bear Crawl is a fundamental drill designed to enhance explosiveness and lateral movement for offensive linemen. Starting on all fours, players move 10 yards while maintaining a low, aggressive stance. This drill focuses on quick footwork, hand placement, and core stability. It mimics the explosiveness needed in game situations, such as pulling or blocking at the second level. Coaches often incorporate this drill to improve reaction time and overall athleticism. Proper technique ensures players stay balanced and generate power from their legs and hips, making it an essential tool for developing agile and explosive linemen.

Combination and Pull Drills

Combination drills refine offensive linemen’s ability to coordinate blocks in tandem. Pull drills enhance timing and synchronization, ensuring seamless execution of complex blocking schemes during games.

5.1 Double Pull Drill

The Double Pull Drill involves both the guard and tackle pulling from the same side. It aims to create a powerful blocking duo, clearing lanes for the ball carrier.

  • Both linemen pull simultaneously, targeting the same gap or linebacker.
  • Timing and communication are crucial for effective execution.
  • This drill emphasizes coordination and explosive movement, simulating game situations where dual blocking is necessary.

By mastering this drill, linemen improve their ability to dominate at the point of attack and create seams for the offense to exploit.

5.2 Down Block Technique

The Down Block Technique is a fundamental blocking method where linemen block down on defensive linemen, creating a seal for the ball carrier. It requires precise footwork and hand placement.

  • Linemen aim to drive the defender inside, opening a running lane;
  • Proper body positioning and leverage ensure effective contact and control.
  • This technique is often used in combination with pull blocks to create a cohesive blocking scheme.

Mastery of the Down Block enhances the offense’s ability to establish a strong running game and control the line of scrimmage.

Offensive Line Mindset and Discipline

Discipline and focus are critical for offensive linemen, ensuring consistent execution and integrity in blocking assignments. Teamwork and mental toughness form the backbone of a successful offensive line.

6.1 Importance of Finishing Blocks

Finishing blocks is crucial for offensive linemen, ensuring opponents are controlled until the whistle blows. This mindset fosters physical and mental toughness, preventing defensive counterplays. Proper technique ensures safety and dominance. Coaches emphasize discipline in maintaining block integrity, as a half-finished block can lead to missed opportunities. Drills like the Finish Block Drill simulate game scenarios, teaching linemen to stay engaged and explosive through contact. Consistent finishing builds trust among teammates and enhances overall unit performance. It’s not just about initial contact but sustaining effort to secure victories. This discipline separates elite blockers from the average, making it a cornerstone of offensive line success.

  • Emphasizes physical and mental toughness.
  • Prevents defensive counterplays and missed opportunities.
  • Drills like the Finish Block Drill reinforce proper technique and discipline.

6.2 Playing to the Whistle

Playing to the whistle is a vital discipline for offensive linemen, ensuring they maintain effort until the play ends. This mindset prevents penalties and maximizes blocking efficiency. Coaches stress the importance of staying engaged, as late movement can draw flags. Drills like the Whistle Drill simulate real-game scenarios, teaching linemen to react appropriately. Consistent focus builds mental toughness and accountability. By playing to the whistle, linemen demonstrate commitment and discipline, enhancing team performance. This habit is non-negotiable in elite-level football, as it directly impacts game outcomes. Coaches emphasize its importance in both practice and games to ensure a competitive edge.

  • Prevents unnecessary penalties and maintains blocking efficiency.
  • Drills like the Whistle Drill reinforce discipline and focus.
  • Builds mental toughness and accountability among linemen.

printable trailer bill of sale pdf

A printable trailer bill of sale PDF is a customizable document facilitating the transfer of trailer ownership. It ensures a smooth, legally binding transaction between seller and buyer.

1.1 What is a Trailer Bill of Sale?

A trailer bill of sale is a legal document that transfers ownership of a trailer from the seller to the buyer. It includes essential details such as the trailer’s description, VIN, purchase price, and seller and buyer information. This document serves as proof of sale and is often required for registration and title transfer. It ensures a smooth and legally binding transaction.

1.2 Importance of Using a Trailer Bill of Sale PDF

A trailer bill of sale PDF is essential for legal transactions, providing clear proof of ownership transfer. It protects both buyer and seller by documenting key details like price, condition, and identities. This document ensures compliance with regulations, reduces disputes, and serves as a permanent record for future reference. Using a PDF format makes it easy to customize and print for convenience.

Key Details to Include in a Trailer Bill of Sale

A trailer bill of sale must include the VIN, trailer description (make, model, year), purchase price, payment terms, seller and buyer information, and the date of sale.

2.1 Vehicle Identification Number (VIN)

The Vehicle Identification Number (VIN) is a unique 17-character code assigned to the trailer, providing essential identification details. It is crucial to include the correct VIN in the bill of sale to verify the trailer’s identity and ensure the document’s validity. The VIN can typically be found on the trailer’s title, registration, or stamped on the frame near the tongue or axle. Always double-check the VIN for accuracy to avoid legal or ownership issues.

2.2 Trailer Description (Make, Model, Year)

The trailer description section requires detailed information about the make, model, and year of the trailer. This ensures clarity and helps verify the trailer’s identity. Including the manufacturer’s name, specific model number, and production year provides a clear record of the trailer’s specifications. Accurate details prevent disputes and ensure both parties are in agreement about the trailer being sold. This information is also essential for registration and titling purposes.

2.3 Purchase Price and Payment Terms

The purchase price and payment terms section outlines the total amount agreed upon for the trailer. It should include the final sale price, payment method details, and any terms agreed by both parties. This ensures transparency and protects both seller and buyer from disputes. Clear documentation of payment terms helps verify the financial agreement and provides a legally binding record of the transaction.

2.4 Seller and Buyer Information

This section requires the full legal names, addresses, and contact details of both the seller and buyer. Including signatures and dates confirms mutual agreement to the sale. Accurate identification ensures accountability and validates the document. Proper documentation protects both parties by establishing clear ownership transfer and liability release, adhering to legal standards for trailer sales.

Legal Requirements for a Trailer Bill of Sale

A trailer bill of sale must comply with state-specific laws, including notarization and witness requirements. Signatures from both parties and a notary public ensure the document’s legality and authenticity.

3.1 State-Specific Laws and Regulations

State-specific laws regulate trailer bill of sale requirements, varying by jurisdiction. Some states require additional forms, such as VIN verification (e.g., TDMV 19A), while others mandate specific language or notarization. Buyers and sellers must comply with local DMV regulations to ensure the document’s validity. Researching and adhering to these laws is crucial for a legally binding transaction.

3.2 Notarization Requirements

Notarization requirements vary by state but are often mandated to validate a trailer bill of sale. A certified notary witnesses the signing, ensuring authenticity and voluntary execution. While not universally required, notarization strengthens the document’s legal standing and prevents fraud. Proper execution, including clear signatures and unaltered text, is essential for notarization to be recognized as valid.

3.4 Required Signatures and Witnesses

A trailer bill of sale requires signatures from both the seller and buyer to validate the transaction. Witnesses may be mandatory in some jurisdictions to attest to the signing. Proper identification of all parties involved is crucial. The document must be signed in the presence of a notary in states requiring notarization, ensuring the agreement’s authenticity and legal enforceability.

How to Create a Printable Trailer Bill of Sale PDF

Creating a printable trailer bill of sale PDF involves downloading a template, customizing it with relevant details, and saving or printing it for use in transactions.

4.1 Downloading a Template Online

Downloading a trailer bill of sale template online is a convenient option. Websites like legal form databases, state DMVs, or office supply stores offer free or paid templates. Ensure the template includes sections for VIN, vehicle description, purchase price, and signatures. Choose a format compatible with your software for easy customization. Always verify the template’s compliance with your state’s legal requirements.

4.2 Customizing the Template with Relevant Information

Customize the trailer bill of sale template by filling in the VIN, trailer description, purchase price, and payment terms. Include seller and buyer details, such as names, addresses, and signatures. Add any additional clauses or conditions specific to the sale. Ensure all information is accurate and complete to avoid legal disputes. Review and edit the document thoroughly before finalizing it for signing.

4.3 Saving and Printing the Document

After customizing the trailer bill of sale, save it as a PDF to preserve formatting. Print the document on high-quality paper for clarity. Ensure all text is legible and properly aligned. Keep a digital copy for records and provide physical copies to both seller and buyer. Verify printer settings before printing to maintain professionalism and readability in the final document.

Common Mistakes to Avoid When Using a Trailer Bill of Sale

Ensure all parties sign the document to validate the sale. Lack of signatures or witnesses can lead to disputes and render the bill of sale invalid.

5.1 Incomplete or Incorrect Information

One of the most common mistakes is providing incomplete or incorrect details in the bill of sale. Errors in the VIN, purchase price, or descriptions of the trailer can lead to legal disputes. Always double-check the trailer’s make, model, year, and identification number. Typos or omissions can delay title transfers or invalidate the document. Ensure all information is accurate and matches official records.

5.2 Lack of Signatures or Witnesses

A common oversight is omitting required signatures or witnesses. For a trailer bill of sale to be legally valid, both the buyer and seller must sign the document. Some states also require witness signatures or notarization. Without these, the document may be deemed invalid, leading to legal disputes or delays in transferring ownership. Always ensure all parties sign and witnesses are present if required.

5.3 Not Keeping a Copy for Records

Failing to keep a copy of the trailer bill of sale can lead to legal and administrative issues. Both parties should retain a copy for their records to avoid disputes. Without a copy, proving ownership or the terms of the sale becomes challenging. Always make multiple copies and store them securely to ensure easy access when necessary.

Where to Find Printable Trailer Bill of Sale Templates

Printable trailer bill of sale templates can be found on online legal form websites, state DMV websites, and at office supply stores for easy access and convenience.

6.1 Online Legal Form Websites

Online legal form websites offer a wide variety of printable trailer bill of sale templates. Platforms like LegalZoom or LawDepot provide customizable and legally compliant forms; These websites ensure that the templates meet state-specific requirements, making them reliable for users. They also offer easy downloads and printing options, saving time and effort. This is a convenient option for those needing a professional and accurate document quickly.

6.2 State DMV Websites

State DMV websites often provide official printable trailer bill of sale templates tailored to local regulations. These forms are designed to meet specific state requirements, ensuring compliance and accuracy. They are freely accessible and reliable, offering clear instructions for completion. Using a DMV-provided template helps avoid legal issues and streamlines the process of transferring trailer ownership.

6.3 Office Supply Stores

Office supply stores like Staples and Office Depot offer printable trailer bill of sale templates. These forms are available in-store or online, ensuring easy access. They provide structured layouts with essential fields, making it simple to fill out accurately. Purchasing from a reputable store guarantees a professional and legally sound document for trailer transactions.

Best Practices for Filling Out a Trailer Bill of Sale

Use clear, legible handwriting and ensure all details are accurate; Double-check information before signing and store the document securely for future reference.

7.1 Using Clear and Legible Handwriting

When filling out a trailer bill of sale, use clear and legible handwriting to ensure all information is easily readable. Avoid scribbles or smudges that could cause confusion. Properly formed letters and numbers prevent disputes or misunderstandings. Legibility ensures both parties can review and verify details without difficulty, maintaining the document’s professionalism and legal integrity.

7.2 Double-Checking All Information Before Signing

Double-checking all information before signing ensures accuracy and prevents potential disputes. Review the VIN, make, model, year, purchase price, and both parties’ details; Verify that all data is correct and complete. This step is crucial for maintaining the document’s validity and ensuring both buyer and seller are in agreement. It prevents future misunderstandings and safeguards the transaction’s integrity.

7.3 Storing the Document Safely

Store the signed trailer bill of sale in a secure, dry location to protect it from damage or loss. Consider using a fireproof safe or a locked drawer. For added security, scan the document and save it digitally with a strong password. Keeping a backup ensures easy access and prevents potential disputes. Always maintain a copy for your records.

efficacious novena to the sacred heart of jesus pdf

The Efficacious Novena to the Sacred Heart of Jesus is a traditional Catholic devotion, offering a powerful way to seek divine blessings and spiritual renewal through focused prayer and reflection.

1.1. What is a Novena?

A novena is a traditional Catholic devotion consisting of nine days of prayer, often seeking spiritual benefits, graces, or miracles. Rooted in early Christian practices, it honors the Sacred Heart of Jesus, emphasizing devotion, reflection, and faith. This structured prayer cycle fosters a deeper connection with the divine, aligning with the teachings of saints like St. Margaret Mary Alacoque and St. Padre Pio, who championed its efficacy.

1.2. The Significance of the Sacred Heart of Jesus

The Sacred Heart of Jesus symbolizes His boundless love and mercy, embodying divine compassion for humanity. It is a central devotion in Catholic tradition, representing Christ’s selfless sacrifice and enduring care for all souls. This sacred symbol inspires believers to seek refuge in His love, fostering a deeper spiritual connection and trust in His divine providence and grace.

1.3. The Purpose of the Efficacious Novena

The Efficacious Novena seeks to deepen devotion to the Sacred Heart, offering a structured prayer routine to attain spiritual growth and divine intervention. It serves as a means to implore grace, healing, and mercy, fostering a profound connection with Jesus through heartfelt supplication and reflection. This novena is particularly valued for its ability to bring solace and transformative grace to those who recite it with faith and sincerity.

Historical Background of the Novena

Originating from the visions of St. Margaret Mary Alacoque, the Efficacious Novena to the Sacred Heart of Jesus has a rich historical background, deeply rooted in Catholic devotion and popularized by St. Padre Pio, making it a timeless prayer for seeking divine mercy and grace.

2.1. Attribution to St. Margaret Mary Alacoque

St. Margaret Mary Alacoque, a French nun, is credited with introducing the devotion to the Sacred Heart of Jesus. Through her visions, she emphasized Jesus’ desire to share His love, leading to the creation of the Efficacious Novena. Her writings and spiritual insights laid the foundation for this powerful prayer, which has become a cornerstone of Catholic devotion, inspiring millions to seek divine mercy and grace through the Sacred Heart.

2.2. The Role of St. Padre Pio in Popularizing the Novena

St. Padre Pio, a revered Italian priest, played a significant role in spreading the Efficacious Novena to the Sacred Heart of Jesus. He recited this novena daily for those seeking his prayers, emphasizing its power to bring comfort, healing, and spiritual strength. His devotion and endorsement elevated the novena’s prominence, inspiring countless faithful to adopt it as a regular practice, fostering a deeper connection to the Sacred Heart worldwide.

Structure of the Efficacious Novena

The novena consists of a nine-day prayer cycle, incorporating daily prayers, reflections, and devotions to the Sacred Heart of Jesus, fostering a deep spiritual connection.

3;1. Daily Prayers and Reflections

The novena involves daily prayers and reflections, focusing on devotion to the Sacred Heart of Jesus. Each day includes specific prayers, such as the Our Father, Hail Mary, and Glory Be, along with heartfelt supplications to the Sacred Heart. Reflections encourage participants to contemplate Jesus’ love and mercy, fostering a deeper spiritual connection and personal growth throughout the nine-day cycle.

3.2. The Nine-Day Prayer Cycle

The Efficacious Novena follows a structured nine-day prayer cycle, traditionally prayed before the Feast of the Sacred Heart. Each day focuses on specific intentions and devotions, with prayers recited faithfully by devotees. This cycle, popularized by saints like Padre Pio, emphasizes consistent and heartfelt prayer, fostering spiritual unity and perseverance as participants seek divine grace and blessings throughout the novena period.

3.3. Incorporating the Sacred Heart of Jesus Devotion

The novena deeply incorporates devotion to the Sacred Heart of Jesus, emphasizing trust and surrender. Daily prayers focus on consecrating oneself to His Heart, seeking mercy and grace. The novena’s structure, including traditional prayers like the Our Father and Hail Mary, fosters a profound connection to Jesus’ divine love, encouraging devotees to embrace His compassion and live faithfully in His presence, as reflected in the PDF version.

Spiritual Benefits of the Novena

The Efficacious Novena deepens spiritual growth and trust in Jesus’ love, offering comfort and divine grace to those who pray with sincerity and devotion.

4.1. Deepening Devotion to the Sacred Heart

The Efficacious Novena fosters a profound connection with the Sacred Heart of Jesus, nurturing love, trust, and surrender. Through daily prayers and reflections, devotees deepen their relationship with Christ, experiencing His boundless mercy and compassion. This novena, rooted in tradition, encourages a heartfelt commitment to living according to Jesus’ teachings, transforming the heart and drawing believers closer to God’s loving embrace.

4.2. Seeking Grace and Mercy

The Efficacious Novena is a powerful means of seeking God’s grace and mercy. Through heartfelt prayers, devotees petition the Sacred Heart for forgiveness, healing, and spiritual guidance. This novena, rooted in trust and surrender, invites believers to experience Jesus’ boundless compassion. By reciting the prayers, individuals open themselves to receive divine favors, drawing strength from the Sacred Heart’s infinite love and mercy.

4.3. Strengthening Faith and Trust in Jesus

Reciting the Efficacious Novena deepens one’s faith and trust in Jesus, fostering a profound reliance on His divine providence; Through daily prayers and reflections, believers experience a renewed confidence in God’s plan, even amidst life’s challenges. The novena’s focus on the Sacred Heart symbolizes Jesus’ boundless love, encouraging devotees to surrender their anxieties and doubts, trusting in His infinite mercy and guidance. This spiritual practice nurtures a steadfast and unwavering trust in Jesus.

How to Recite the Efficacious Novena

The Efficacious Novena is recited over nine days, incorporating prayers like the Our Father and Hail Mary, seeking grace, with a PDF available for convenient daily guidance and reflection.

5.1. Preparing for the Novena

Preparing for the Efficacious Novena involves setting aside dedicated time for prayer, reflection, and intention. Print or download the PDF version for convenience, ensuring daily access to the prayers. Begin by identifying your intentions, whether personal or for others, and mentally prepare to focus on the Sacred Heart’s love and mercy. Create a peaceful environment for prayer, free from distractions, to deepen your spiritual experience throughout the nine days.

5.2. Daily Prayer Routine

The daily prayer routine consists of reciting specific prayers from the novena PDF, including the Our Father, Hail Mary, and Glory Be. Each day focuses on a unique intention, fostering a deeper connection with the Sacred Heart. Participants are encouraged to pray with sincerity, reflecting on Jesus’ love and mercy. Consistency in the daily routine is key to experiencing the novena’s spiritual benefits and fostering a lasting devotion to the Sacred Heart of Jesus.

5.3. Combining Prayer with Reflection

Combining prayer with reflection enhances the spiritual experience of the novena, fostering a deeper connection with the Sacred Heart. Each prayer is followed by moments of silent reflection, allowing participants to meditate on Jesus’ love and mercy. This practice encourages introspection, gratitude, and a renewed commitment to living according to His teachings. Reflection strengthens the prayer’s intent, making it a transformative part of the daily routine, leading to spiritual growth and a closer bond with the Divine.

The Efficacious Novena in PDF Format

The Efficacious Novena to the Sacred Heart of Jesus is widely available in PDF format, offering devotees a convenient and accessible way to pray and reflect daily.

6.1. Availability of the PDF Version

The Efficacious Novena to the Sacred Heart of Jesus is readily available in PDF format online, accessible for download from various Catholic websites and prayer resources. This version ensures that devotees can easily print or view the novena, making it convenient to incorporate into daily spiritual routines. Its widespread availability has made it a popular choice for those seeking a structured prayer experience.

6.2. Benefits of Using the PDF for Prayer

The PDF version of the Efficacious Novena to the Sacred Heart of Jesus offers numerous benefits, including easy readability, portability, and the ability to print or share with others. It provides a structured format for daily prayer, ensuring consistency and focus. The PDF also preserves the traditional layout and language of the novena, making it ideal for those seeking a spiritually enriching and devotionally profound experience.

6.3. Sharing the PDF with Others

Sharing the PDF of the Efficacious Novena to the Sacred Heart of Jesus allows others to benefit from its spiritual richness. It can be easily distributed via email, social media, or printed copies, making it accessible to a wider audience. This sharing fosters communal devotion and prayer, enabling individuals to unite in their spiritual journey. The PDF format ensures clarity and readability, preserving the novena’s integrity for all who receive it.

Prayers and Devotions Included in the Novena

The novena includes the Our Father, Hail Mary, and Glory Be, along with specific prayers to the Sacred Heart, fostering deep devotion and spiritual connection to Jesus.

7.1. The Our Father, Hail Mary, and Glory Be

The novena incorporates traditional Catholic prayers like the Our Father, Hail Mary, and Glory Be, which are central to devotion and serve as a foundation for seeking divine intercession. These prayers, recited daily, deepen spiritual connection and humility, aligning with the novena’s purpose of pleading for grace and mercy through the Sacred Heart of Jesus. Their inclusion underscores the novena’s roots in timeless Catholic tradition and prayerful surrender to God’s will.

7.2. Specific Prayers to the Sacred Heart

The novena includes heartfelt prayers directed to the Sacred Heart, emphasizing trust, compassion, and divine mercy. These prayers, often attributed to St. Margaret Mary Alacoque, express deep devotion and seek grace through the Sacred Heart’s infinite love. They are recited alongside traditional prayers, creating a balanced and meaningful spiritual practice that honors Jesus’ boundless mercy and redemptive love; These specific prayers are central to the novena’s efficacy and emotional resonance.

7.3. The Significance of Each Prayer

Each prayer in the novena holds profound spiritual significance, fostering a deeper connection with the Sacred Heart of Jesus. They are crafted to express devotion, seek mercy, and surrender to God’s will. The prayers emphasize trust, compassion, and the pursuit of grace, making them a powerful tool for spiritual renewal and personal transformation. Their repetition and heartfelt recitation create a meaningful dialogue with the Divine, enriching the soul and deepening faith.

The Role of the Sacred Heart of Jesus in Catholic Tradition

The Sacred Heart of Jesus symbolizes God’s boundless love and mercy, serving as a central devotion in Catholic tradition, inspiring followers to embrace compassion and fidelity to Christ.

8.1. The Feast of the Sacred Heart

The Feast of the Sacred Heart, celebrated annually in June, honors Jesus’ divine love and mercy. Rooted in the visions of St. Margaret Mary Alacoque, it emphasizes devotion to Christ’s Heart as a symbol of His boundless compassion; Catholics worldwide observe this feast through prayer, adoration, and reflection, seeking spiritual renewal and deeper union with God, aligning with the novena’s intent to invoke divine grace and mercy.

8.2. Devotional Practices Associated with the Sacred Heart

Devotional practices honoring the Sacred Heart include the Efficacious Novena, First Fridays devotion, and the Litany of the Sacred Heart. These rituals foster deep spiritual connection, emphasizing Jesus’ boundless love and mercy. They encourage acts of reparation, adoration, and consecration, helping believers seek divine grace and cultivate a heart centered on Christ’s love, aligning with the novena’s purpose of invoking mercy and strengthening faith.

Testimonials and Miracles Attributed to the Novena

Many believers share stories of miracles, healing, and spiritual renewal after praying the Efficacious Novena to the Sacred Heart of Jesus, highlighting its profound impact on faith and trust in divine mercy.

9.1. Stories of Grace and Healing

Countless individuals have shared testimonies of divine intervention after reciting the Efficacious Novena to the Sacred Heart of Jesus. Many report miraculous healings, emotional peace, and profound spiritual transformations. These stories underscore the novena’s power to connect believers with Jesus’ boundless mercy and grace, fostering hope and deepening faith in His loving providence.

9.2. The Impact of the Novena on Personal Faith Journeys

Many believers have experienced profound spiritual growth through the Efficacious Novena to the Sacred Heart of Jesus. It deepens devotion, fosters a closer connection with Jesus, and strengthens trust in His divine plan. The novena’s consistent prayer and reflection guide individuals toward emotional peace, clarity of purpose, and a renewed commitment to their faith, transforming their spiritual lives in meaningful ways.

The Efficacious Novena to the Sacred Heart of Jesus, endorsed by saints like Padre Pio and St. Margaret Mary Alacoque, offers a profound way to deepen faith and trust in Jesus, providing comfort and spiritual renewal through its timeless prayers and reflections.

10.1. Encouragement to Recite the Novena

Embrace the Efficacious Novena to the Sacred Heart of Jesus as a powerful spiritual practice, fostering intimacy with Christ. This novena, recited daily by St. Padre Pio, invites believers to trust in Jesus’ promises, seek His mercy, and experience transformative grace. By committing to this devotion, faithful followers can deepen their relationship with the Sacred Heart, finding solace and strength in times of need, and nurturing a heart of love and compassion.

10.2. The Enduring Power of Prayer to the Sacred Heart

Prayer to the Sacred Heart of Jesus embodies timeless devotion, offering solace, healing, and spiritual transformation. This novena, rooted in tradition, invites believers to trust in Jesus’ boundless mercy and love. Through heartfelt recitation, faithful seekers experience profound grace, fostering a deeper connection with the Divine. The enduring power of this prayer lies in its ability to bring hope, comfort, and renewed faith, resonating across generations as a testament to God’s eternal love and compassion.

brother lx3125e manual

Overview of the Brother LX-3125E Manual

The Brother LX-3125E manual is a comprehensive guide for operating and maintaining the sewing machine‚ offering detailed instructions‚ safety tips‚ and troubleshooting solutions for optimal performance and longevity․

1․1 Key Features and Benefits of the Brother LX-3125E Sewing Machine

The Brother LX-3125E sewing machine is a versatile and user-friendly model designed for both beginners and experienced sewers․ It offers a variety of stitch options‚ an automatic needle threader‚ and a free-arm design for easy sewing of cuffs and sleeves․ The machine is lightweight‚ durable‚ and suitable for handling multiple fabric types․ Its intuitive controls and comprehensive manual support make it an excellent choice for home sewing projects․

1․2 Importance of Reading the Manual Before Use

Reading the Brother LX-3125E manual is essential for safe and effective operation․ It provides clear instructions on setup‚ usage‚ and maintenance‚ helping users understand the machine’s features and capabilities․ The manual also highlights safety precautions‚ reducing the risk of accidents․ By following the guidelines‚ users can troubleshoot common issues‚ optimize performance‚ and extend the machine’s lifespan․ It ensures a smooth sewing experience for both beginners and experienced sewers․

How to Download the Brother LX-3125E Manual

Visit Brother’s official website‚ search for the LX-3125E model‚ and download the PDF manual for free․ Ensure Adobe Acrobat Reader is installed for viewing the document․

2․1 Step-by-Step Guide to Accessing the PDF Manual

Visit the official Brother website and navigate to the support section․ Select the Brother LX-3125E model from the product list․ Click on the “Manuals & Downloads” tab and choose the desired manual․ Follow the prompts to download the PDF file․ Ensure Adobe Acrobat Reader is installed to view the document․ The manual is available in English and includes detailed instructions for optimal use of the sewing machine․

2․2 System Requirements for Viewing the Manual

To view the Brother LX-3125E manual‚ ensure your device has Adobe Acrobat Reader installed for PDF compatibility․ The manual is accessible on Windows‚ macOS‚ and mobile devices with a PDF viewer․ A stable internet connection is required for downloading; Ensure sufficient storage space and a minimum screen resolution of 1024×768 for clarity; No additional software is needed beyond a PDF viewer for basic viewing․

Safety Precautions and Guidelines

Always follow safety guidelines to avoid accidents․ Read all instructions before use‚ ensure proper setup‚ and keep loose clothing tied back․ Avoid operating near children or flammable materials․

3․1 Essential Safety Tips for Operating the Sewing Machine

Always follow safety guidelines to ensure safe operation․ Use the correct power supply‚ avoid flammable materials nearby‚ and keep children away․ Tie back loose clothing and long hair․ Never touch sharp edges or hot surfaces․ Use only accessories recommended by Brother․ Regularly maintain the machine to prevent malfunctions․ Keep the work area clean and well-lit․ Unplug the machine during cleaning or maintenance․

3․2 Warnings and Cautions Highlighted in the Manual

The manual emphasizes critical warnings to ensure user safety․ Avoid using the machine near water or in humid environments‚ as this may cause electrical hazards․ Never leave the machine unattended while in operation․ Keep fingers away from moving parts and avoid touching sharp components like needles or blades․ Use only approved Brother accessories to prevent damage or malfunctions․ Always unplug the machine during cleaning or maintenance to avoid accidents․

Basic Sewing Operations

The Brother LX-3125E manual provides clear instructions for basic sewing operations‚ including setting up the machine‚ selecting stitches‚ and customizing settings for a variety of fabric types efficiently․

4․1 Getting Started with the Brother LX-3125E

The Brother LX-3125E manual provides a step-by-step guide to help users get started․ It begins with unboxing and setting up the machine‚ followed by basic safety precautions․ The manual outlines how to thread the machine‚ wind the bobbin‚ and select the correct stitch settings․ Additionally‚ it includes a quick reference guide for easy access to essential operations‚ ensuring users can begin sewing projects confidently after reading the initial setup instructions․

4․2 Selecting Stitches and Customizing Settings

The Brother LX-3125E manual details how to select from various built-in stitches‚ including straight‚ zigzag‚ and decorative options․ Users can customize stitch length‚ width‚ and tension for specific fabrics․ The manual also explains how to save personalized settings for frequent projects‚ ensuring efficiency․ Advanced features like automatic needle threading and a backlit LCD screen enhance user experience‚ making stitch selection and customization intuitive and seamless for sewists of all skill levels․

Maintenance and Care Tips

Regular cleaning and lubrication are essential to maintain the Brother LX-3125E’s performance․ Use only recommended accessories and follow guidelines to prevent damage and ensure longevity․

5․1 Regular Maintenance to Extend Machine Lifespan

Regular maintenance is crucial for extending the lifespan of the Brother LX-3125E․ Clean the bobbin area and feed dogs frequently to remove dust and debris․ Lubricate moving parts as specified to ensure smooth operation․ Check for worn or damaged components and replace them promptly․ Store the machine in a dry‚ cool place when not in use to prevent rust and damage․ Proper care ensures optimal performance and longevity․

5․2 Cleaning and Lubricating the Machine

Regular cleaning and lubrication are essential for maintaining the Brother LX-3125E․ Use a soft brush to remove dust and debris from the bobbin area and feed dogs․ Apply a few drops of sewing machine oil to moving parts‚ such as the shuttle hook and handwheel‚ every 500 stitches․ Avoid over-lubricating‚ as it can attract dust and cause mechanical issues․ Proper cleaning and lubrication prevent wear and tear‚ ensuring smooth operation and extending the machine’s lifespan․

Troubleshooting Common Issues

The Brother LX-3125E manual provides practical solutions for common operational problems‚ including error messages‚ thread issues‚ and mechanical malfunctions‚ ensuring efficient and effective troubleshooting․

6․1 Diagnosing and Solving Operational Problems

The manual helps users identify and resolve issues like thread breakage or machine jams by checking thread tension‚ needle condition‚ and bobbin alignment․ It also addresses error messages‚ guiding users to refer to specific solutions in the troubleshooting section․ Regular maintenance‚ such as cleaning and lubricating‚ is emphasized to prevent mechanical issues․ Additionally‚ it advises restarting the machine if it freezes and ensuring all parts are properly secured for smooth operation․ Always use genuine Brother accessories to avoid compatibility problems and maintain performance․ By following these steps‚ users can quickly diagnose and fix common operational issues‚ ensuring uninterrupted sewing sessions․ The manual also provides visual diagrams and step-by-step instructions to aid in understanding and resolving problems effectively․ Proper care and adherence to guidelines can extend the machine’s lifespan and prevent major malfunctions․ If issues persist‚ contacting Brother’s customer support is recommended for further assistance․ This section is designed to empower users with the knowledge to handle common challenges confidently․ Regularly reviewing this guide ensures users are well-prepared to maintain their machine’s optimal performance․ Troubleshooting becomes easier with the detailed explanations and practical solutions offered in the manual․

6․2 Error Messages and Their Solutions

The Brother LX-3125E manual lists common error messages‚ such as “E1” for needle issues or “E3” for bobbin problems‚ and provides clear solutions․ It advises checking thread tension‚ ensuring proper needle alignment‚ and cleaning the machine regularly․ For persistent errors‚ users are guided to reset the machine or contact Brother support․ Solutions are presented in a user-friendly manner‚ ensuring quick resolution and minimal downtime․ The manual also emphasizes the importance of using genuine Brother parts to avoid compatibility issues․ By following these solutions‚ users can address errors effectively and maintain smooth operation․ This section is designed to help users troubleshoot common issues independently‚ reducing the need for professional assistance․ The error message guide is comprehensive‚ covering both mechanical and software-related problems‚ and offers step-by-step fixes for each scenario․ Regularly reviewing this section helps users anticipate and prevent potential errors‚ ensuring a seamless sewing experience․ The manual’s clear instructions and practical advice make it an invaluable resource for resolving operational challenges․ With detailed explanations and actionable solutions‚ users can quickly restore their machine to optimal performance․ This section is a key part of the manual‚ empowering users to handle errors confidently and efficiently․ The error solutions are presented in an easy-to-understand format‚ making troubleshooting accessible to all skill levels․ By addressing each error message with a specific solution‚ the manual ensures that users can resolve issues without frustration․ This comprehensive approach to error handling enhances the overall user experience and extends the machine’s lifespan․ The manual’s focus on error resolution underscores Brother’s commitment to providing reliable and user-friendly products․ With this guide‚ users can overcome common challenges and continue sewing without interruption․ The error solutions section is a testament to the thoroughness of the Brother LX-3125E manual‚ ensuring that every potential issue is addressed with clarity and precision․

Accessories and Compatible Parts

The Brother LX-3125E manual highlights essential accessories like needles‚ bobbins‚ and presser feet․ Using genuine Brother parts ensures optimal performance‚ compatibility‚ and maintains warranty coverage effectively․

7․1 Recommended Accessories for Optimal Performance

For the Brother LX-3125E‚ genuine accessories like needles‚ bobbins‚ and presser feet are essential․ These ensure compatibility and maintain performance․ Additional accessories include zipper feet‚ buttonhole cutters‚ and extension tables‚ enhancing versatility for various sewing projects․ Using Brother-approved parts guarantees reliability and preserves the machine’s warranty‚ ensuring optimal functionality and extending its lifespan․

7․2 Finding Genuine Brother Replacement Parts

For the Brother LX-3125E‚ genuine replacement parts can be sourced directly from Brother International or authorized retailers․ Visit the Brother website or check the official FAQs for a list of compatible parts․ Ensure authenticity by purchasing from trusted sources to maintain performance and warranty validity․ Adobe Acrobat Reader may be required to view part references or diagrams in the manual or support documents․

Advanced Features and Functions

The Brother LX-3125E offers advanced stitch customization‚ multiple needle positions‚ and special sewing techniques‚ enabling users to create intricate designs and tailored projects with precision and ease․

8․1 Exploring Special Stitch Patterns and Techniques

The Brother LX-3125E manual highlights various stitch patterns‚ including decorative‚ stretch‚ and heirloom stitches․ It guides users on techniques like free-arm sewing‚ buttonhole creation‚ and quilting․ Customizable stitch lengths and widths allow for personalized projects․ The manual also provides tips for mastering advanced sewing techniques‚ ensuring users can explore creative possibilities with ease and precision․

8․2 Customizing Sewing Projects with Advanced Settings

The Brother LX-3125E manual details how to customize sewing projects using advanced settings‚ such as adjustable stitch length and width‚ programmable needle positions‚ and memory storage for favorite settings․ Users can explore decorative stitching‚ automatic thread cutting‚ and precision tension control․ These features enable tailor-made designs‚ ensuring versatility and creativity in every sewing project․

Comparison with Similar Brother Models

The Brother LX-3125E stands out for its compact design‚ advanced stitch options‚ and user-friendly interface compared to other models like the LX-3817‚ offering versatile sewing solutions for various needs․

9․1 Key Differences Between LX-3125E and Other Models

The Brother LX-3125E distinguishes itself with its compact size‚ advanced stitch options‚ and user-friendly interface compared to models like the LX-3817․ It offers enhanced portability and a wider range of stitch patterns‚ making it ideal for both beginners and experienced sewers․ Exclusive features include a superior threading system and customizable settings‚ ensuring versatility and efficiency for various sewing projects‚ setting it apart from other Brother models in its class․

Customer Support and Resources

Brother offers comprehensive customer support‚ including FAQs‚ videos‚ and downloadable resources for the LX-3125E․ Users can access official manuals‚ troubleshooting guides‚ and contact options for assistance directly from Brother․

10․1 Contacting Brother International for Assistance

For assistance with the Brother LX-3125E‚ users can contact Brother International through their official website․ The site provides a support section with contact forms‚ phone numbers‚ and email options․ Customers can also access FAQs‚ troubleshooting guides‚ and repair service information․ Brother’s customer service team is available to address queries‚ provide technical support‚ and assist with warranty or maintenance-related issues․

10․2 Additional Resources for Learning and Troubleshooting

Beyond the manual‚ Brother offers extensive online resources‚ including video tutorials‚ FAQs‚ and interactive guides․ The official Brother website provides troubleshooting tips‚ software updates‚ and user forums․ Additional materials like quick reference guides and repair manuals can be downloaded for free․ These resources help users master advanced features‚ resolve common issues‚ and enhance their sewing skills effectively․

marie callender pie crust instructions

Marie Callender’s pie crusts are a convenient and flavorful choice for home bakers, offering a flaky texture and buttery taste perfect for sweet or savory pies.

1.1 Overview of Marie Callender Pie Crust

Marie Callender’s pie crusts are pre-made, flaky, and buttery, offering convenience for home bakers. They are crafted with basic ingredients like flour, butter, and water, ensuring a light and tender texture. Perfect for both sweet and savory pies, these crusts provide a consistent and delicious base for various fillings, making them a popular choice for effortless baking experiences.

1.2 Popularity and Convenience

Marie Callender’s pie crusts are widely popular due to their ease of use and consistent quality. They save time for home bakers, eliminating the need to make dough from scratch. The crusts are ready to thaw and bake, making them a convenient option for creating delicious pies without the hassle of preparing homemade pastry, appealing to both novice and experienced bakers alike.

Baking Instructions for Frozen Marie Callender Pie Crust

Thaw the crust, preheat your oven to 375F, and bake until golden. Follow package instructions for precise times to achieve a perfectly flaky crust every time.

2.1 Thawing the Pie Crust

Thaw the frozen Marie Callender pie crust at room temperature for about 15-20 minutes until pliable. Avoid over-thawing to maintain its structure. Lightly prick the bottom and sides with a fork to prevent air bubbles during baking, ensuring an even texture and golden finish.

2.2 Preparing the Crust for Baking

After thawing, lightly brush the crust with a beaten egg or milk for a golden finish. Prick the bottom and sides with a fork to prevent air bubbles. For blind baking, line the crust with parchment paper and fill with pie weights. Bake at 375°F (190°C) for 12-15 minutes, then remove weights for a final bake of 5-10 minutes until lightly browned.

2.3 Baking Temperatures and Times

Bake the Marie Callender pie crust at 375°F (190°C). For a filled pie, bake for 45-60 minutes until the crust is golden and filling bubbles. For an unfilled crust, bake at 400°F (200°C) for 12-15 minutes. If edges brown too quickly, cover with foil to prevent burning. Always preheat the oven and adjust baking time as needed for optimal results.

Making Marie Callender Pie Crust from Scratch

Making Marie Callender pie crust from scratch uses simple ingredients like flour, salt, sugar, cold butter, and ice water, requiring minimal handling for a flaky texture.

3.1 Essential Ingredients

The key components for a homemade Marie Callender-style pie crust include all-purpose flour for structure, salt for flavor, sugar for balance, cold unsalted butter for flakiness, and ice water to bind the dough without overworking it, ensuring a light and delicate texture.

3.2 Mixing and Handling the Dough

Combine flour, salt, and sugar, then cut in cold butter until a coarse texture forms. Gradually add ice water, mixing until dough holds together without overworking. Keep ingredients cold to ensure flakiness. Gently fold and press dough into a disk for chilling, avoiding excessive handling to maintain a tender, light crust texture.

Common Issues and Troubleshooting

Crust failing during baking or burning are common issues. Solutions include adjusting oven temperatures, using foil to prevent burning, and ensuring proper thawing and handling techniques.

4.1 Crust Failing During Baking

Crust failure during baking can occur due to overworking the dough, causing it to become tough and dense. To prevent this, ensure the dough is handled gently and kept cold. Additionally, incorrect oven temperatures or uneven baking can lead to cracks or undercooked areas. Proper thawing and preheating are essential for a successful bake. Avoid overfilling the crust to maintain its structure during baking.

4.2 Preventing Crust from Burning

To prevent the crust from burning, cover the edges with aluminum foil or a pie shield during baking. Lowering the oven rack can also help distribute heat evenly. Use pie weights for blind baking to prevent bubbles and ensure even browning. Keep an eye on the crust during the last few minutes of baking and adjust as needed to avoid over-browning.

Tools and Equipment Needed

Baking sheets, pie pans, utensils like a fork or brush, and pie weights are essential for preparing and baking Marie Callender pie crusts effectively.

5.1 Baking Sheets and Pans

Use a sturdy baking sheet or pie pan to support the crust during baking. Place the crust on parchment-lined sheets for easy cleanup and to prevent sticking. Ensure the pan is large enough to accommodate the crust without stretching it, as this can lead to uneven baking or cracking. Always handle hot pans with oven mitts or tongs to avoid burns.

5.2 Utensils for Preparing the Crust

Essential tools include a rolling pin for flattening the dough, a fork for pricking the crust, and a sharp knife for trimming edges. Parchment paper or a silicone mat helps prevent sticking. A pastry brush is useful for applying egg wash or milk for a golden finish. Always handle hot crusts with oven mitts or tongs to avoid burns.

Tips for Achieving a Flaky Crust

Handle dough minimally to preserve flaky layers, use cold butter for optimal texture, and ensure ice water is well-incorporated. Prick the crust and use pie weights for even baking.

6.1 Handling the Dough Properly

Proper handling ensures a flaky crust. Mix ingredients just until combined, avoid overworking, and keep dough cold. Lightly roll it out on floured surfaces, gently lifting to prevent stretching. This technique maintains layers, enhancing flakiness and texture. Handling with care also prevents shrinking during baking, ensuring a perfectly formed crust every time.

6.2 Blind Baking Techniques

Blind baking involves pre-baking the crust without filling. Prick the bottom with a fork to prevent air bubbles. Line with parchment paper and add pie weights or beans. Bake at 375°F for 12-15 minutes until golden. This ensures the crust holds its shape and prevents it from puffing up during baking, resulting in a perfectly cooked base for your filling.

Special Dietary Considerations

Marie Callender’s pie crusts are dairy-free and considered vegan, making them suitable for plant-based diets. Perfect for those seeking delicious, flaky crusts without dairy products.

7.1 Vegan and Dairy-Free Options

Marie Callender’s pie crusts are dairy-free and vegan-friendly, catering to plant-based diets. Made without dairy products, they offer a convenient, pre-made option for those seeking delicious, flaky crusts. Perfect for sweet or savory pies, these crusts provide an excellent alternative for vegans while maintaining their signature buttery flavor and texture.

7.2 Adjustments for Sweet or Savory Pies

For sweet pies, lightly brush the crust with milk or beaten egg for a golden finish. For savory pies, omit this step and prick the crust with a fork to prevent air bubbles. Adjustments ensure optimal results, maintaining the crust’s flaky texture and flavor in both sweet and savory recipes. Perfect for versatile pie creations.

Storing and Freezing the Pie Crust

Store Marie Callender pie crusts in the fridge for up to 3 days or freeze for up to 3 months; Thaw frozen crusts at room temperature for 15-20 minutes before use for optimal results.

8.1 Proper Storage Methods

Store Marie Callender pie crusts in their original packaging to maintain freshness. Keep refrigerated for up to 3 days or freeze for up to 3 months. For refrigeration, ensure the crust is sealed tightly to prevent drying out. When freezing, place the crust in an airtight container or freezer-safe bag. Thaw frozen crusts at room temperature for 15-20 minutes before use for best results. Always store in a cool, dry place to preserve quality.

8.2 Freezing for Later Use

To freeze Marie Callender pie crusts, place them in their original packaging or wrap tightly in plastic wrap and aluminum foil. Store in a freezer-safe bag for up to 3 months. Frozen crusts can be baked directly without thawing, though thawing at room temperature for 15-20 minutes ensures easier handling. Always label and date frozen crusts for organization and freshness.

Pre-Baking the Crust

Pre-baking, or blind baking, involves baking the crust without filling. Preheat the oven to 375F (190C), thaw the crust slightly, prick the bottom, and bake for 12-15 minutes with pie weights to prevent air bubbles and ensure a flat surface for fillings.

9.1 When to Pre-Bake

Pre-baking is essential for pies with unbaked fillings, such as cream or chiffon pies, to prevent the crust from becoming soggy. Gently prick the bottom with a fork, line with parchment, and add pie weights. Bake at 375F (190C) for 12-15 minutes until lightly golden, ensuring a crisp base for your dessert.

9.2 Using Pie Weights

Pie weights are crucial for pre-baking to keep the crust flat and prevent air bubbles. Line the crust with parchment paper, fill with weights, and bake for 10-12 minutes. Remove the weights and parchment carefully, then bake an additional 5 minutes to ensure the crust is fully cooked and holds its shape perfectly.

Common Mistakes to Avoid

Common mistakes include overworking the dough, leading to a tough crust, and using incorrect oven temperatures, affecting the bake. Avoid these for better results.

10.1 Overworking the Dough

Overworking the dough is a common mistake that leads to a tough, dense crust. Mix ingredients just until combined, and handle the dough gently to preserve flakiness. Avoid excessive rolling or pressing, as this develops gluten, making the crust less tender. Keep ingredients cold to maintain butter’s texture, ensuring a light and flaky result. Proper handling ensures a perfect bake.

10.2 Incorrect Oven Temperatures

Using the wrong oven temperature can lead to an undercooked or overly browned crust. Always preheat to the recommended 375F (190C) for Marie Callender pie crusts. Too low, and the crust may not bake evenly; too high, and it may burn. Monitor baking times closely and cover edges with foil if browning too quickly to ensure a perfectly golden crust every time.

Mastering Marie Callender pie crust instructions ensures perfect results. With proper thawing, baking, and handling, you’ll achieve a flaky, golden crust every time for a delicious, memorable dessert.

11.1 Final Tips for Perfect Results

For perfect results, always thaw Marie Callender pie crusts at room temperature to maintain pliability. Brushing with egg wash enhances browning, while avoiding overworking the dough preserves flakiness. Pre-bake if needed, and monitor oven temperatures to prevent burning. These simple steps ensure a golden, delicious crust for any pie filling.

free driving instructor teaching aid pdf

This comprehensive guide offers a structured approach to driver training‚ helping instructors effectively prepare learners for the driving test with clear visuals and practical scenarios.

Overview of the Driving Instructor Teaching Aid

The Driving Instructor Teaching Aid PDF is a comprehensive resource designed to help instructors effectively train learners to meet the driving test standard. It includes structured lesson plans‚ visual aids‚ and practical scenarios to cover essential driving topics such as junctions‚ roundabouts‚ and traffic lights. The guide incorporates feedback from Approved Driving Instructors (ADIs)‚ focusing on clear‚ uncluttered visuals and real-life examples. It also includes road signs‚ markings‚ and “Show Me Tell Me” questions‚ aligning with the latest driving test changes. The PDF is ideal for both new and experienced instructors‚ offering a flexible and organized approach to teaching learners of all skill levels.

  • Structured lesson plans for efficiency.
  • Visual aids for complex driving scenarios.
  • Incorporates ADI feedback for effectiveness.

Importance of Visual Aids in Driving Lessons

Visual aids are essential in driving lessons as they help learners understand complex scenarios and retain information more effectively. Diagrams and illustrations simplify concepts like junctions‚ roundabouts‚ and traffic lights‚ making them easier to grasp. By using clear‚ uncluttered visuals‚ instructors can demonstrate driving maneuvers and hazard perception without overwhelming students. Visual aids also enhance engagement‚ allowing learners to visualize real-life situations before encountering them on the road. This approach reduces anxiety and builds confidence‚ enabling students to apply what they’ve learned during actual driving. The inclusion of such resources in the Free Driving Instructor Teaching Aid PDF ensures lessons are both effective and memorable.

  • Enhances understanding of complex driving scenarios.
  • Improves knowledge retention and reduces learner anxiety.
  • Prepares students for real-life driving situations.

Key Components of the Free Driving Instructor Teaching Aid PDF

This PDF includes structured training systems‚ diagrams‚ road signs‚ and show me tell me questions‚ ensuring comprehensive lesson planning and effective learner engagement.

  • Structured Driver Training System
  • Included Diagrams and Scenarios
  • Road Signs and Show Me Tell Me Questions

Structured Driver Training System

The Structured Driver Training System in the Free Driving Instructor Teaching Aid PDF is designed to break down complex driving skills into manageable‚ logical steps. This system ensures learners progress smoothly from basic to advanced driving techniques‚ building confidence and competence. By focusing on clear‚ concise instruction‚ it aligns with the ADI method (Alert‚ Direct‚ Identify)‚ helping instructors deliver effective lessons. The system also includes lesson objectives and Q&A sessions‚ making it adaptable to individual learning needs. This structured approach not only saves time but also ensures learners grasp essential skills‚ preparing them for real-world driving scenarios and the driving test with ease and efficiency.

  • Logical progression of skills
  • Clear instruction and feedback
  • Alignment with the ADI method

Included Diagrams and Scenarios

The Free Driving Instructor Teaching Aid PDF includes a wide range of diagrams and scenarios to help learners understand complex driving situations. From junctions and roundabouts to traffic lights and meeting traffic‚ these visuals provide clear‚ real-world examples. Scenarios are designed to simulate actual driving conditions‚ allowing learners to practice decision-making and hazard awareness. The PDF also covers road signs‚ markings‚ and Show Me Tell Me questions‚ ensuring comprehensive preparation for the driving test. These resources make lessons engaging and interactive‚ helping learners grasp key concepts quickly and confidently. The diagrams are uncluttered and easy to follow‚ making them ideal for visual learners.

Road Signs‚ Markings‚ and Show Me Tell Me Questions

The Free Driving Instructor Teaching Aid PDF includes detailed sections on road signs‚ markings‚ and Show Me Tell Me questions‚ essential for learner drivers. These visuals help learners recognize and understand traffic rules‚ ensuring safer driving practices. Road signs are categorized and explained‚ while markings are illustrated in real-world contexts. The PDF also features two dedicated pages of Show Me Tell Me questions‚ covering both vehicle safety checks and driving scenario explanations. This comprehensive approach enables learners to confidently handle these aspects of the driving test. Instructors can use these resources to create engaging and informative lessons‚ reinforcing key knowledge areas for their students.

Benefits for Driving Instructors

The Free Driving Instructor Teaching Aid PDF enhances lesson planning efficiency‚ offering a structured system‚ clear visuals‚ and practical methods like the ADI approach‚ aiding instructors in preparing learners effectively.

Time Efficiency in Lesson Planning

The Free Driving Instructor Teaching Aid PDF streamlines lesson preparation‚ saving instructors valuable time. With pre-designed diagrams‚ scenarios‚ and structured lesson objectives‚ instructors can quickly organize sessions. The resource eliminates the need to create materials from scratch‚ allowing more time for teaching and pupil interaction. Additionally‚ the clear and concise format ensures that lessons are focused and effective‚ reducing unnecessary planning complexity. This efficiency enables instructors to concentrate on delivering high-quality training‚ ensuring learners progress smoothly toward test readiness. The PDF’s organized layout also makes it easy to adapt lessons to individual pupil needs‚ further enhancing teaching effectiveness and productivity.

ADX Method (Alert‚ Direct‚ Identify)

The ADX Method (Alert‚ Direct‚ Identify) is a structured approach to teaching‚ ensuring clear and effective communication between instructors and learners. It begins with alerting the pupil to a specific situation or task‚ followed by direct‚ concise instructions to guide their actions. Finally‚ the instructor identifies and confirms understanding or outcomes‚ providing immediate feedback. This method keeps lessons focused and ensures learners remain engaged. By simplifying complex scenarios‚ the ADX Method enhances learning efficiency and reduces confusion. It is particularly effective for addressing common driving challenges‚ making it an invaluable tool for instructors aiming to deliver impactful and structured training sessions.

Local Knowledge and Lesson Objectives

Local knowledge plays a crucial role in effective driving instruction‚ as familiarity with specific road conditions and areas enhances lesson relevance. Instructors can tailor lessons to address common local hazards‚ ensuring learners are well-prepared for real-world scenarios. Clear lesson objectives provide a structured framework‚ helping instructors stay focused on key teaching points. By aligning lessons with specific goals‚ instructors can track progress and ensure learners develop essential skills. This approach also allows for adaptability‚ enabling instructors to address individual needs while maintaining a consistent teaching standard. Combining local insights with defined objectives ensures practical‚ effective training that prepares learners for both the driving test and everyday driving challenges.

Benefits for Learner Drivers

Clear visuals and structured lessons help learners grasp driving concepts quickly‚ building confidence and improving decision-making skills for real-world scenarios and successful test outcomes.

Clear and Concise Visual Learning

The free driving instructor teaching aid PDF emphasizes the use of clear and concise visual aids to enhance learner understanding. By incorporating diagrams and scenarios‚ learners can quickly grasp complex driving concepts. Visual learning reduces confusion and ensures lessons are engaging‚ making it easier for learners to retain information. The structured approach helps learners understand traffic scenarios and road signs effectively. This method also aligns with the ADX (Alert‚ Direct‚ Identify) technique‚ ensuring learners are well-prepared for real-world driving challenges. Clear visuals make lessons more interactive and help learners develop better decision-making skills behind the wheel.

Understanding Traffic Scenarios

The free driving instructor teaching aid PDF provides detailed diagrams and real-life traffic scenarios to help learners understand complex driving situations. From navigating junctions and roundabouts to handling traffic lights and meeting oncoming traffic‚ the guide offers clear visual representations. These scenarios are designed to improve learners’ ability to anticipate and react to hazards‚ ensuring safer driving practices. By breaking down each scenario into manageable steps‚ the PDF enables learners to develop a deeper understanding of traffic dynamics. This comprehensive approach not only builds confidence but also prepares learners for the practical challenges they will face during their driving test and beyond.

Preparation for the Driving Test

The free driving instructor teaching aid PDF is tailored to help learners excel in their driving test by covering essential topics and scenarios. It includes over 100 pages of diagrams‚ road signs‚ and markings‚ as well as show me tell me questions‚ ensuring comprehensive preparation. The structured driver training system reduces the average lesson hours needed to pass‚ from 47 to just 30‚ making it an efficient tool for test success. By focusing on clear lesson objectives and real-life traffic situations‚ the PDF equips learners with the knowledge and confidence to perform well during the exam. Its practical approach ensures learners are well-prepared for the driving test.

Additional Resources and Support

The PDF is digitally downloadable‚ offering instructors easy access to resources. Feedback sessions and Q&A support are available‚ ensuring continuous improvement and updates for optimal teaching outcomes.

Feedback and Q&A Sessions

Feedback and Q&A sessions are integral to refining teaching methods and addressing learner challenges. Instructors can gather insights from students‚ identify strengths‚ and improve areas needing attention. This interactive approach fosters a collaborative learning environment‚ ensuring learners feel supported and confident in their progress. Additionally‚ Q&A segments allow for real-time problem-solving‚ clarifying doubts‚ and reinforcing key concepts. The PDF resource encourages instructors to incorporate feedback loops into their lessons‚ promoting continuous improvement and adaptability. By fostering open communication‚ these sessions enhance the overall effectiveness of driving lessons‚ helping learners grasp complex scenarios and prepare thoroughly for their tests.

Online Availability and Digital Downloads

The free driving instructor teaching aid PDF is conveniently available for digital download‚ ensuring instant access to its comprehensive resources. Once purchased or downloaded‚ a direct link is emailed‚ allowing instructors to access over 100 pages of structured content effortlessly. This digital format saves time and reduces the hassle of physical materials‚ making it ideal for modern teaching environments. The PDF includes detailed diagrams‚ realistic scenarios‚ and essential questions‚ all organized to support lesson planning and delivery. Its online availability ensures that instructors can easily incorporate it into their workflows‚ providing learners with the visual and practical aids they need to succeed.

Continuous Improvement and Updates

The free driving instructor teaching aid PDF undergoes regular updates to reflect the latest driving test changes and instructional methods. This ensures that instructors always have access to current and relevant materials. Feedback from instructors and learner drivers is actively sought to identify areas for enhancement‚ making the resource more effective over time. Updates often include new scenarios‚ revised road signs‚ and additional teaching strategies. This commitment to continuous improvement guarantees that the PDF remains a valuable tool for driving instructors‚ helping them deliver high-quality lessons and keep up with evolving standards in driver education.

The free driving instructor teaching aid PDF is an essential tool‚ offering structured training‚ visual aids‚ and practical resources to enhance both instructor effectiveness and learner success.

Final Thoughts on the Free Driving Instructor Teaching Aid PDF

The free driving instructor teaching aid PDF is a comprehensive resource that enhances teaching and learning experiences. It provides a structured approach to driver training‚ ensuring instructors can deliver lessons effectively. With clear visuals‚ practical scenarios‚ and essential tools like road signs and “Show Me‚ Tell Me” questions‚ it simplifies complex concepts for learners. The ADX method and local knowledge integration further boost its utility. Regular updates and digital accessibility make it a convenient tool for modern instructors. This aid not only saves time in lesson planning but also ensures learners gain confidence and skills needed to pass their driving tests successfully. It’s a must-have for driving instructors aiming to deliver high-quality training.

fundamentals of structural analysis 6th edition pdf

Structural analysis examines how structures respond to external loads, ensuring safety and durability. It involves understanding loads, stresses, and material behavior, essential for engineering safe buildings and bridges.

What is Structural Analysis?

Structural analysis is the process of examining how structures respond to external loads, such as weight, wind, or earthquakes. It involves calculating stresses, strains, and displacements to ensure structures are safe, stable, and durable. This analysis is fundamental in engineering, as it helps predict and mitigate potential failures.

By applying principles of physics and mathematics, structural analysis determines the behavior of materials and systems under various conditions. It integrates material properties, load distributions, and boundary conditions to provide insights into a structure’s performance. Accurate analysis ensures compliance with design standards, protecting people and infrastructure from potential hazards. Advanced tools and methodologies, such as FEM, enhance precision and efficiency in modern structural analysis.

Importance of Structural Analysis in Engineering

Structural analysis is crucial in engineering as it ensures the safety, durability, and cost-effectiveness of buildings, bridges, and other infrastructure. By evaluating how structures respond to various loads, engineers can design systems that withstand environmental and operational stresses. This process minimizes the risk of structural failures, protecting human life and property. Additionally, structural analysis optimizes material usage, reducing construction costs while maintaining performance standards. It also ensures compliance with building codes and regulations. Without structural analysis, engineers cannot guarantee the reliability of their designs, leading to potential disasters. Thus, it is a cornerstone of civil and structural engineering, enabling the creation of resilient and efficient structures.

Key Concepts in Structural Analysis

Structural analysis involves understanding fundamental principles like equilibrium, stress distribution, and deformation. These concepts ensure structures are safe and functional, forming the basis of engineering design.

Loads and Reactions

Loads are external forces acting on a structure, such as weights, impacts, or environmental forces like wind and earthquakes. Reactions are the supporting forces at the structure’s base or supports. Analyzing these forces ensures equilibrium, enabling accurate design and safety assessments. Static and dynamic loads must be considered, along with their distribution across structural elements. Proper calculation of reactions is critical for determining support requirements and ensuring structural stability. Understanding loads and reactions is fundamental to predicting how structures behave under various conditions and to ensuring their safety and functionality throughout their lifespan. This analysis forms the basis of all structural design processes.

Material Behavior and Properties

Material behavior and properties are critical in structural analysis, as they determine how materials respond to loads. Key properties include elasticity, plasticity, strength, and stiffness. Elasticity allows materials to return to their original shape after loading, while plasticity refers to permanent deformation. Strength indicates the maximum stress a material can withstand without failing, and stiffness relates to resistance to deformation. Understanding these properties helps engineers select appropriate materials for structures, ensuring durability and safety. Factors like temperature, loading rate, and environmental conditions can influence material behavior. Accurate knowledge of these properties is essential for predicting structural performance under various conditions and ensuring reliable designs. This understanding is fundamental to modern engineering practices.

Methods of Structural Analysis

Structural analysis methods include static and dynamic approaches. Static analysis evaluates equilibrium and deformation under constant loads, while dynamic analysis considers time-dependent forces and vibrations.

Static Analysis

Static analysis is a fundamental method in structural engineering used to determine the equilibrium and deformation of structures under constant loads. It involves calculating internal forces, stresses, and strains caused by external loads, ensuring the structure’s stability and safety. Static analysis assumes that loads do not change over time and focuses on the structure’s resistance to external forces. This method is widely applied in the design of beams, columns, and trusses. By understanding the distribution of forces and material behavior, engineers can ensure that structures withstand anticipated loads without failure. Static analysis forms the basis for more complex dynamic evaluations.

Dynamic Analysis

Dynamic analysis examines the behavior of structures under time-dependent loads, such as earthquakes, wind, or moving vehicles, where inertia and damping forces play a critical role. Unlike static analysis, it considers how structures respond to varying forces over time, including resonance and oscillations. This method is essential for ensuring the safety and functionality of structures subjected to dynamic excitations. Engineers use advanced techniques, including modal analysis and time-history methods, to predict structural responses. Dynamic analysis helps in designing structures that can withstand natural disasters and operational vibrations, ensuring resilience and minimizing potential damage or failure under dynamic conditions.

Structural Analysis Tools and Software

Advanced software like ETABS, STAAD.Pro, and Autodesk Robot enable precise structural simulations, ensuring optimal design and compliance with engineering standards, enhancing accuracy and efficiency in analysis.

Finite Element Method (FEM)

The Finite Element Method (FEM) is a numerical technique used to solve partial differential equations, widely applied in structural analysis to simulate stress, strain, and deformation. By discretizing a structure into smaller elements, FEM simplifies complex problems into manageable calculations. Each element’s behavior is analyzed, and results are combined to provide an overall solution. FEM excels in handling complex geometries, nonlinear material behavior, and varied load conditions. It is extensively used in engineering for designing and analyzing components like beams, plates, and 3D structures. The method ensures accurate predictions of structural performance, making it indispensable in aerospace, civil, and mechanical engineering applications.

Software Applications in Structural Analysis

Software applications play a crucial role in modern structural analysis, enabling engineers to simulate and analyze complex structures efficiently. Programs like Autodesk, SolidWorks, and ANSYS utilize finite element methods to predict stress, strain, and deformation. These tools offer 3D modeling, dynamic analysis, and material nonlinear analysis capabilities. Specialized software such as ETABS and STAAD.Pro are widely used for building and bridge design. They integrate advanced algorithms to ensure accurate simulations and compliance with design codes. Additionally, software like Abaqus and LS-DYNA handle high-performance simulations for specialized applications. These applications accelerate the design process, enhance precision, and support the creation of sustainable and resilient structures, making them indispensable in contemporary engineering practices.

Applications of Structural Analysis

Structural analysis is vital for ensuring safety and durability in building design, bridge construction, and industrial facilities, enabling engineers to create sustainable and resilient structures.

Building Design and Construction

Structural analysis is fundamental in building design and construction, ensuring structures can withstand external loads like wind, earthquakes, and gravity. It involves designing safe, durable buildings using advanced materials and techniques.

Bridge Engineering

Structural analysis plays a critical role in bridge engineering, ensuring bridges can withstand dynamic loads, such as traffic and natural forces. It involves evaluating stress distribution, material durability, and structural integrity to guarantee safety and longevity. Advanced techniques, like finite element analysis, are used to simulate real-world conditions, enabling engineers to design efficient and resilient structures. Bridge engineering relies on precise calculations to account for factors like weight distribution, environmental impacts, and long-term material behavior. By applying principles of structural analysis, engineers can create durable, cost-effective bridges that meet modern transportation demands while minimizing environmental impact.

Challenges in Structural Analysis

Structural analysis faces challenges like complex load conditions, material nonlinearity, and modeling inaccuracies, requiring advanced computational methods to ensure accurate predictions and reliable designs under various conditions.

Complex Load Conditions

Complex load conditions present significant challenges in structural analysis, as they involve multiple, varying forces acting on a structure simultaneously; These loads can be static, dynamic, or cyclic, and may include combinations of axial, torsional, and bending stresses. Analyzing such conditions requires advanced computational methods to accurately predict how structures behave under varied and extreme scenarios. Engineers must account for factors like load distribution, material behavior, and boundary conditions to ensure structural integrity. Modern tools, such as finite element analysis (FEA) software, enable detailed modeling of these complex interactions. Accurate prediction of stress distributions and deformations is critical to prevent failures and ensure safety. Overcoming these challenges is essential for designing resilient and efficient structures.

Material Nonlinearity

Material nonlinearity refers to the behavior of materials that deviates from linear elasticity, where stress is not proportional to strain. This occurs when materials exhibit plasticity, creep, or other inelastic responses under load. Nonlinear material behavior is particularly significant in extreme conditions, such as high stresses or large deformations, where materials may yield or fracture. Analyzing such behavior requires advanced computational models to capture the complex stress-strain relationships and failure mechanisms accurately.

Nonlinear material effects, such as strain hardening or softening, complicate structural analysis. Engineers must use specialized software to simulate these behaviors, ensuring designs account for potential material degradation or instability. Accurate modeling of material nonlinearity is critical for predicting structural performance under real-world conditions.

Future Trends in Structural Analysis

Future trends include advancements in computational methods, AI, and machine learning for simulations. Sustainable materials and energy-efficient designs are also expected to shape the field significantly.

Advancements in Computational Methods

Recent advancements in computational methods have revolutionized structural analysis, enabling more accurate and efficient simulations. Finite Element Method (FEM) and computational fluid dynamics (CFD) are now integrated with machine learning algorithms to predict material behavior and optimize designs. Cloud-based simulation tools allow engineers to analyze complex structures in real-time, reducing costs and improving collaboration. Additionally, AI-driven software automates iterative design processes, accelerating project timelines. These technologies also enable the analysis of large datasets, providing deeper insights into structural performance under various conditions. As computational power grows, so does the ability to model intricate systems, ensuring safer and more sustainable structures for the future.

Sustainable and Resilient Structures

Advancements in structural analysis are driving the development of sustainable and resilient structures. Modern techniques focus on optimizing material use, reducing environmental impact, and ensuring structures can withstand extreme conditions. Green building practices, such as energy-efficient designs and recycled materials, are increasingly incorporated. Resilience is enhanced through adaptive designs that account for climate change and natural disasters. Computational tools enable precise simulations to test sustainability and resilience. These innovations promote long-term durability, minimize resource consumption, and align with global sustainability goals, ensuring structures are both environmentally friendly and capable of enduring future challenges while maintaining functionality and safety.

search for truth bible study pdf

The Search for Truth Bible Study is a comprehensive, ten-lesson course exploring the Bible from Genesis to Revelation, designed for in-home study with visual aids, fostering personal spiritual growth and encouraging the sharing of truth with others.

1.1 Overview of the Study

The Search for Truth Bible Study is a structured ten-lesson course designed for in-home learning, covering the entire Bible from Genesis to Revelation. Each lesson utilizes visual aids and charts to enhance understanding, making complex biblical concepts accessible. The study provides a comprehensive exploration of Scripture, encouraging participants to apply its teachings to their daily lives and deepen their spiritual growth. This format allows individuals to engage with God’s Word in a personal and meaningful way.

1.2 Importance of Seeking Truth in Bible Study

Seeking truth in Bible study fosters a deeper understanding of God’s Word, enabling believers to apply its teachings to their lives. This pursuit encourages personal spiritual growth, clarity in faith, and a stronger connection to Scripture. By actively engaging with the Bible, individuals can discern its relevance and meaning, leading to a more authentic and purpose-driven life. The Search for Truth Bible Study guides participants in this journey, helping them uncover the richness and transformative power of the Bible.

Structure of the Search for Truth Bible Study

The Search for Truth Bible Study is structured as a ten-lesson course, systematically exploring the Bible from Genesis to Revelation, ensuring a comprehensive understanding of God’s Word.

2.1 Ten-Lesson Course Outline

The Search for Truth Bible Study is organized into a ten-lesson course, carefully designed to guide students through the Bible from Genesis to Revelation. Each lesson builds upon the previous one, providing a structured and progressive learning experience. The course includes visual aids and charts to enhance understanding, making it ideal for in-home study. This outline ensures a comprehensive exploration of key biblical themes, promoting a deeper connection with God’s Word and fostering spiritual growth.

2.2 Coverage from Genesis to Revelation

The Search for Truth Bible Study spans from Genesis to Revelation, offering a holistic understanding of the Bible. It begins with creation in Genesis, explores key events and teachings in the Old Testament, transitions through the life of Christ, and concludes with the prophetic visions in Revelation. This comprehensive approach ensures students grasp the overarching narrative and timeless truths of Scripture, fostering a deep appreciation for God’s plan and purpose throughout history.

Key Features of the Study

The Search for Truth Bible Study offers in-home flexibility, visual aids, and interactive elements, ensuring engaging and personalized learning experiences tailored to diverse learning styles and preferences.

3.1 In-Home Bible Study Benefits

The Search for Truth Bible Study offers the convenience of in-home learning, allowing participants to explore biblical truths in a comfortable and familiar environment. This setting fosters deeper personal reflection and family engagement. With flexible scheduling, individuals can study at their own pace, enhancing retention and spiritual growth. The course materials, including PDF lessons and charts, are easily accessible, making it simple to integrate Bible study into daily life without external pressures. This approach promotes meaningful connections with Scripture and encourages consistent, impactful learning.

3.2 Use of Visual Aids and Charts

The Search for Truth Bible Study incorporates visual aids and charts to enhance understanding and engagement. These tools present complex biblical concepts in an organized, visually appealing manner, making lessons more interactive and memorable. Charts and diagrams simplify key doctrines, timelines, and themes, while PDF versions ensure accessibility for in-home study. Visual aids cater to different learning styles, helping participants grasp and retain information effectively, and fostering a deeper connection with the Scripture. This approach enriches the study experience and promotes clarity.

3.3 Flexibility for Different Learning Styles

The Search for Truth Bible Study is designed to accommodate various learning styles, ensuring accessibility for everyone. Interactive elements, such as group discussions and visual aids, cater to both visual and auditory learners. PDF versions of lessons and charts allow for self-paced study, while the structured yet adaptable format enables participants to engage according to their preferences. This flexibility makes the course effective for individuals or groups, ensuring a personalized and enriching experience for all learners.

Theological Foundations

The Search for Truth Bible Study is rooted in the authority of Scripture, emphasizing doctrinal integrity and a literal interpretation of God’s Word, ensuring a solid biblical foundation.

4.1 Authority of Scripture

The Search for Truth Bible Study is built on the foundational belief in the authority of Scripture, upholding the Bible as the inspired, infallible, and inerrant Word of God. This study emphasizes the importance of relying solely on biblical teachings, ensuring that all lessons are grounded in the text. By focusing on the authority of Scripture, participants are encouraged to trust in its divine origin and reliability, making it central to their spiritual journey and understanding of God’s plan.

4.2 Doctrinal Emphasis in Lessons

The Search for Truth Bible Study places a strong emphasis on doctrinal accuracy, ensuring each lesson aligns with biblical teachings. Key doctrines such as creation, salvation, and the Second Coming are presented clearly and systematically. Lessons are designed to equip participants with a solid understanding of Scripture, enabling them to apply biblical principles to their lives. This doctrinal focus ensures a balanced and comprehensive approach to studying God’s Word, fostering spiritual growth and a deeper connection to His truth.

Engagement and Interaction

The study incorporates interactive elements and group discussions to foster deeper understanding and personal connection with biblical teachings, enhancing the learning experience through shared insights and reflections.

5.1 Interactive Elements for Deeper Understanding

The study utilizes visual aids, charts, and thought-provoking questions to enhance engagement. These tools help participants visualize biblical concepts and apply teachings to real-life situations. Interactive elements encourage active participation, fostering a deeper connection to the material. PDF versions of lessons and charts are available, making it easy to follow along and review. This approach not only clarifies complex ideas but also creates a dynamic learning environment where individuals can explore and share insights, enriching their spiritual journey.

5.2 Role of Group Discussions

Group discussions play a vital role in fostering deeper understanding and engagement within the study. Participants share insights, ask questions, and explore biblical teachings collectively. This collaborative approach encourages active learning, clarifies doubts, and strengthens spiritual growth. Group interactions also provide emotional support and accountability, making the study more impactful and relatable. The sharing of perspectives enriches the learning experience, helping individuals apply biblical truths to their lives effectively.

Impact and Application

The Search for Truth Bible Study fosters personal spiritual growth and equips participants to apply biblical truths in daily life, inspiring them to share their faith with others.

6.1 Personal Spiritual Growth

The Search for Truth Bible Study fosters profound personal spiritual growth by guiding participants through a comprehensive exploration of Scripture. Through in-depth lessons and visual aids, individuals deepen their understanding of God’s Word, strengthening their faith and nurturing a personal relationship with Christ. The study’s structured approach encourages practical application of biblical truths, leading to transformative spiritual development and a stronger foundation for living out one’s faith. This journey equips believers to mature in their walk with God and apply His teachings in daily life.

6.2 Sharing the Truth with Others

The Search for Truth Bible Study equips participants to confidently share biblical truths with others. By providing clear, structured lessons and visual aids, the course empowers individuals to effectively communicate God’s Word. The study’s focus on practical application and evangelism encourages believers to spread the gospel in their communities. With a strong foundation in Scripture, participants are motivated to share their faith, inspiring others to seek a deeper relationship with Christ and apply His teachings in their lives.

Resources and Materials

The Search for Truth Bible Study offers PDF versions of lessons, charts, and supplementary materials, providing accessible and structured resources for deeper biblical understanding and application.

7.1 PDF Versions of Lessons and Charts

The Search for Truth Bible Study provides downloadable PDF versions of all lessons and accompanying charts, making it easy to access and print materials for personal or group study. These resources are designed to enhance understanding and retention, offering a structured format for following along with the course. The PDFs include detailed lesson outlines, key verses, and visual aids, ensuring a comprehensive and engaging learning experience. This format is ideal for those who prefer digital access or need to share materials with others.

7.2 Supplementary Study Aids

To complement the PDF lessons, the Search for Truth Bible Study offers additional study aids, including printable charts, timelines, and scripture references. These materials are designed to deepen understanding by visually organizing key concepts and themes. Supplementary aids also include recommended reading lists, cross-referenced Bible verses, and discussion guides, allowing participants to explore topics further. These resources are available for download, making it easy to integrate them into individual or group study sessions, enhancing the overall learning experience.

Case Studies and Testimonials

The Search for Truth Bible Study has impacted many lives, with testimonials sharing personal growth and spiritual renewal. Real-life applications highlight its effectiveness in fostering deeper faith and understanding.

8.1 Real-Life Applications and Experiences

The Search for Truth Bible Study has inspired numerous individuals to apply biblical principles in their daily lives. Many participants share stories of how the study deepened their faith and transformed their relationships. For instance, some have reported increased involvement in community service, while others highlight improved family dynamics. The study’s practical lessons have empowered believers to navigate life’s challenges with biblical wisdom, fostering a stronger connection to God and His Word. These real-life experiences underscore the study’s enduring impact on spiritual growth and daily living.

8.2 User Feedback and Testimonials

Users have praised the Search for Truth Bible Study for its clarity and depth, with many describing it as life-changing. One participant shared how the study helped them understand the Bible’s relevance to modern life. Another highlighted the structured lessons and visual aids as key to their spiritual growth. Many have expressed gratitude for the study’s ability to foster a deeper connection with God. The overwhelmingly positive feedback underscores the study’s impact on individuals seeking biblical truth and practical application.

The Search for Truth Bible Study concludes with a strong emphasis on continued spiritual growth and the importance of sharing biblical truths. Future updates aim to enhance accessibility and deepen engagement for new generations.

9.1 The Ongoing Journey of Truth-Seeking

The Search for Truth Bible Study encourages believers to embrace a lifelong journey of seeking biblical truths. By exploring Scripture deeply, participants cultivate a curiosity-driven faith, leading to spiritual growth and practical application. The study’s structure, from Genesis to Revelation, ensures a holistic understanding of God’s plan, fostering a commitment to ongoing learning and reflection. This journey empowers individuals to apply biblical principles in their daily lives, fostering a deeper connection with God and His Word. The pursuit of truth is a path without end, enriching the soul and transforming the heart.

9.2 Evolving the Study for Future Generations

The Search for Truth Bible Study is designed to adapt to the needs of future generations, ensuring its relevance and accessibility. By incorporating digital formats, such as PDFs and interactive tools, the study remains engaging for modern learners. Continuous updates based on user feedback and theological insights ensure the content stays fresh and impactful. This evolving approach guarantees that the study will continue to inspire spiritual growth and truth-seeking for years to come, reaching diverse audiences with clarity and effectiveness;

lookah ice cream user manual

Welcome to the Lookah Ice Cream Dry Herb Vaporizer‚ a portable and user-friendly device designed for smooth vaporization․ Its compact design‚ advanced features‚ and precise temperature control make it ideal for dry herb enthusiasts seeking high-quality vapor and efficient sessions․

Design and Features of the Lookah Ice Cream

The Lookah Ice Cream features a compact‚ portable design with a Nano Ceramic Heating Chamber‚ 4 variable temperature settings‚ and a long-lasting 950mAh battery for seamless sessions․

Key Components of the Lookah Ice Cream

The Lookah Ice Cream Dry Herb Vaporizer comprises essential components designed for optimal performance․ The Nano Ceramic Heating Chamber ensures even heat distribution and pure flavor․ The device features a compact‚ lightweight design with a durable construction for portability․ It includes a 950mAh battery‚ offering extended sessions between charges․ The vaporizer also boasts four variable temperature settings‚ allowing users to customize their experience․ A sleek mouthpiece provides a comfortable draw‚ while the intuitive controls make operation straightforward․ These components work together to deliver a seamless and enjoyable vaping experience for dry herb enthusiasts․

Heating Technology and Chamber Type

The Lookah Ice Cream Dry Herb Vaporizer utilizes advanced conduction heating technology‚ providing efficient and even heat distribution for consistent vapor production․ This method ensures that your dry herbs are heated uniformly‚ maximizing flavor and potency while minimizing waste․

The device features a Nano Ceramic Heating Chamber‚ known for its clean‚ pure vapor output and durability․ This chamber type is designed to preserve the natural taste of your herbs and offers a smooth vaping experience․ The combination of conduction heating and a high-quality ceramic chamber makes the Lookah Ice Cream an excellent choice for those seeking flavorful and efficient vaporization sessions․

Getting Started with Your Lookah Ice Cream

Welcome to the Lookah Ice Cream! This user-friendly dry herb vaporizer offers a seamless experience with its compact design and intuitive controls‚ ensuring easy operation for all users․

Grinding the Herb for Optimal Vaporization

Properly grinding your herb is essential for optimal vaporization with the Lookah Ice Cream․ Use a fine or medium grinder to achieve a consistent texture‚ ensuring even heating․ Avoid grinding too finely‚ as this can lead to clogging the chamber․ A well-ground herb allows for better airflow and maximizes vapor quality․ Store your ground material in an airtight container to preserve freshness and potency․ Correct grinding enhances flavor and efficiency‚ making your sessions more enjoyable and effective with the Lookah Ice Cream vaporizer․

Loading the Chamber Correctly

To ensure optimal performance‚ load the chamber of your Lookah Ice Cream vaporizer correctly․ Open the chamber by twisting or lifting the mouthpiece‚ depending on the model․ Scoop the ground herb into the chamber‚ filling it to the recommended level without overpacking․ Avoid letting the material spill over the edges․ Gently tamp it down with a packing tool or your finger to ensure even distribution․ Close the chamber securely to prevent leakage․ Proper loading ensures consistent vaporization and avoids clogging or uneven heating; Make sure no material touches the heating element for the best experience․

Using the Lookah Ice Cream Vaporizer

Turn on the device by pressing the button‚ then select your desired temperature․ Once heated‚ take smooth draws to enjoy your vaporized dry herbs effortlessly․

Priming the Device for First Use

Before first use‚ ensure the Lookah Ice Cream Vaporizer is fully charged․ Turn it on and let it heat to the highest temperature without any herb inside․ This process ensures any manufacturing residues are removed‚ guaranteeing a clean first session․ Once primed‚ allow the device to cool down before loading your dry herb․ Proper priming enhances vapor quality and ensures optimal performance right from the start․ Follow this step carefully to enjoy a seamless and flavorful vaping experience․

Understanding Temperature Settings

The Lookah Ice Cream Vaporizer features four variable temperature settings‚ allowing users to customize their vaping experience․ These settings range from 320°F to 420°F‚ providing flexibility for different herb types and personal preferences․ Lower temperatures preserve more flavor and aroma‚ while higher settings produce thicker vapor․ Experiment with the settings to find your ideal balance between vapor quality and flavor․ The device typically reaches the selected temperature quickly‚ ensuring efficient and consistent sessions․ Adjusting the temperature is straightforward‚ and the LED indicators provide clear feedback on the current setting․ This feature enhances control and ensures a tailored experience for every user․

Maintenance and Cleaning Tips

Regularly clean the mouthpiece and chamber with isopropyl alcohol to prevent residue buildup․ Avoid using water‚ as it may damage internal components․ Gently wipe down surfaces and ensure all parts are dry before reassembly․ For tough residue‚ soak removable pieces in alcohol briefly․ Always check and clean the charging contacts to maintain proper connectivity․ This routine maintenance ensures optimal performance and longevity of your Lookah Ice Cream Vaporizer․

Cleaning the Vaporizer After Use

After each session‚ turn off the device and allow it to cool down completely․ Use a cotton swab or soft cloth lightly dampened with isopropyl alcohol to wipe the mouthpiece and chamber․ Gently scrub away any residue or buildup․ For tougher stains‚ soak the removable parts in isopropyl alcohol for a few minutes before rinsing thoroughly․ Avoid submerging electrical components in liquid․ After cleaning‚ use a dry cloth to wipe down all surfaces and ensure no moisture remains․ Regular cleaning prevents clogging and maintains optimal vapor quality․ Always allow the device to dry fully before storing or reusing it․

Replacing Parts and Accessories

Regularly inspect the vaporizer for worn-out parts‚ such as the mouthpiece or Nano Ceramic Heating Chamber․ Replace these components when they show signs of wear or reduced performance․ To replace the mouthpiece‚ simply twist and pull it off‚ then attach the new one securely․ For the heating chamber‚ turn off the device‚ let it cool‚ and carefully remove the old chamber․ Install the new one by aligning it properly and gently twisting it into place․ Always use authentic Lookah replacement parts to ensure compatibility and optimal performance․ Replace parts as needed to maintain vapor quality and device functionality․

Tips for Optimal Use and Vapor Quality

For the best experience with the Lookah Ice Cream‚ grind your herb finely to ensure even vaporization․ Use the lower temperature settings for flavorful hits and higher settings for thicker clouds․ Always prime the device by heating it without drawing to prepare the chamber․ Pack the herb lightly to allow proper airflow․ Clean the vaporizer regularly to prevent residue buildup and maintain vapor quality․ Keep the battery charged and avoid overfilling the chamber․ Experiment with temperature settings to find your preference․ Store the device upright when not in use to prevent spilling․ Replace worn-out parts promptly for consistent performance․

Accessories and Compatible Products

To enhance your experience with the Lookah Ice Cream‚ consider compatible accessories like replacement nano-ceramic heating chambers‚ additional mouthpieces‚ and screens․ A carrying case is ideal for portability‚ while cleaning brushes and isopropyl alcohol ensure proper maintenance․ Rechargeable batteries and chargers are also available for extended use․ Explore compatible grinders for optimal herb preparation․ Always use official or verified third-party accessories to maintain performance and safety․ These additions will help you get the most out of your device and ensure a seamless vaping experience․

Safety Precautions and Best Practices

Avoid overheating by monitoring temperature settings and ensuring proper ventilation․ Always use authentic parts and keep the device away from water and children for safe operation․

General Safety Guidelines

Always handle the Lookah Ice Cream with care‚ keeping it out of reach of children and pets․ Ensure the device is on a stable‚ heat-resistant surface during use․ Avoid exposing it to water or extreme temperatures․ Never modify the device or use damaged accessories‚ as this could cause electrical hazards․ Regularly inspect the vaporizer for wear and tear‚ and replace any worn-out parts promptly․ Follow the user manual instructions carefully to ensure safe and optimal performance․ Proper maintenance and adherence to guidelines will enhance your vaping experience and prolong the device’s lifespan․

Avoiding Overheating Issues

To prevent overheating‚ ensure the Lookah Ice Cream is used correctly․ Avoid pressing the button for extended periods‚ as this can overheat the chamber․ Always allow the device to cool down between sessions․ Use the temperature settings wisely‚ as higher temps can increase the risk of overheating․ Keep the airway clear of blockages to maintain proper airflow․ Never leave the vaporizer unattended while in use; Regular cleaning and maintenance will also help prevent overheating issues․ By following these guidelines‚ you can enjoy a safer and more consistent vaping experience with your Lookah Ice Cream vaporizer․

Troubleshooting Common Issues

If you encounter poor vapor production‚ check if the herb is evenly ground and properly packed․ Weak flavor may result from low temperature settings or insufficient heating time․ If the device doesn’t turn on‚ ensure the battery is charged and the connections are clean․ For uneven heating‚ verify that the chamber is free of blockages․ Regularly cleaning the vaporizer‚ especially the chamber and mouthpiece‚ can resolve many issues․ If problems persist‚ consult the user manual or contact customer support for assistance․ Proper maintenance and usage will help extend the life of your Lookah Ice Cream vaporizer․

The Lookah Ice Cream Dry Herb Vaporizer is a versatile and efficient device designed for smooth‚ flavorful vaporization․ Its portable design‚ precise temperature control‚ and durable construction make it a great choice for both beginners and experienced users․ By following the guidelines in this manual‚ you can maximize vapor quality‚ extend the device’s lifespan‚ and enjoy a seamless vaping experience․ Always prioritize proper maintenance and safe usage to get the most out of your Lookah Ice Cream vaporizer․ Happy vaping!